AdbAutoPlayer
AdbAutoPlayer is a tool that helps you bot Android games. It can do boring or daily tasks for you—like collecting rewards, tapping buttons, or repeating stages—automatically.
It works by using ADB (Android Debug Bridge), which lets your computer control an Android phone, tablet, or emulator.
Important
This tool only works with Android apps. You must use:
- An Android emulator (like MumuPlayer, BlueStacks 5), or
- A real Android phone or tablet
It does not work with:
- iOS devices (iPhone, iPad)
- Official PC or cloud versions of games
Modern & Customizable Interface
AdbAutoPlayer now features a modern, flexible interface designed for better control and visibility:
- Sidebar Navigation: Quickly switch between different profiles and games.
- Live Log Panel: Monitor bot actions in real-time with a dedicated log display.
- Customizable Themes: Personalize the look with a wide range of colors and dark/light modes.
- Flexible View Modes: Choose between Cards, Palette, or Accordion views to organize your tasks.
Check out the UI Guide for more details.
Key Features
- Game Automation: Handles daily quests, farming, and repetitive actions automatically.
- Multi-Game Support: Includes specialized bots for popular mobile games like AFK Journey and Guitar Girl.
- Easy Setup: Designed to be user-friendly and quick to configure with emulators or real devices.
- Cross-Platform: Officially supported on Windows and macOS.
Compatibility
-
Tested on:
- Windows with MumuPlayer and BlueStacks 5
- Apple M1 Max using BlueStacks Air
Download
Important
Please check the user guides on the left before using the tool.
Contact
AFK Journey
Discord: Yaphalla
Channel: adb-auto-player
UI Guide
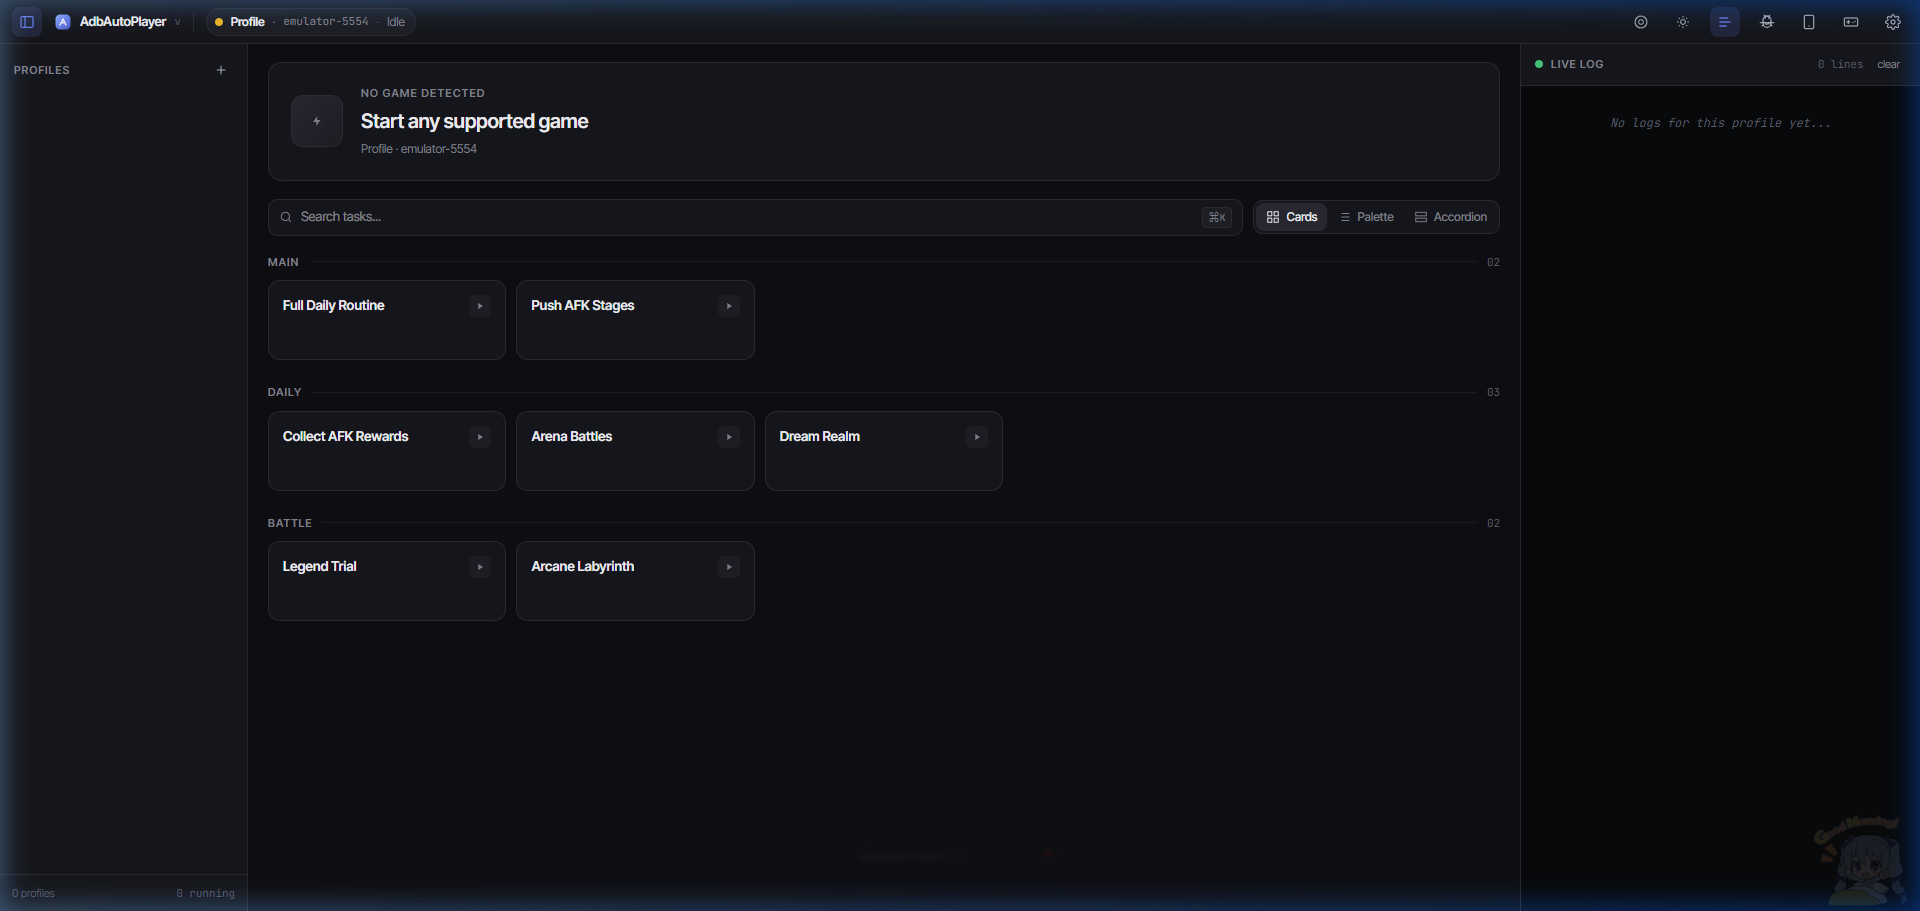
AdbAutoPlayer features a highly customizable and intuitive interface. This guide explains the various components and how to personalize your experience.
Main Components
1. Sidebar Navigation
The sidebar allows you to manage multiple profiles. Each profile can have its own settings and active game.
- Toggle Sidebar: Click the menu icon in the top left to expand or collapse the sidebar.
- Add Profile: Use the “+” button at the bottom of the sidebar to create a new profile.
2. Status Bar
Located at the top, the status bar provides quick access to global actions:
- Theme Customizer: Adjust colors and switch between Light/Dark modes.
- App Settings: Configure global application preferences.
- ADB Settings: Quick access to ADB configuration for the active profile.
- Game Settings: Manage settings specific to the currently detected game.
- Docs: Open this wiki!
- Debug: Run debug tasks to troubleshoot detection issues.
Settings Overlays
Clicking any settings button opens an overlay where you can modify configurations.
- ADB Settings: Configure your device connection.
- App Settings: General program settings like theme and language.
- Game Settings: Settings specific to the currently selected game.
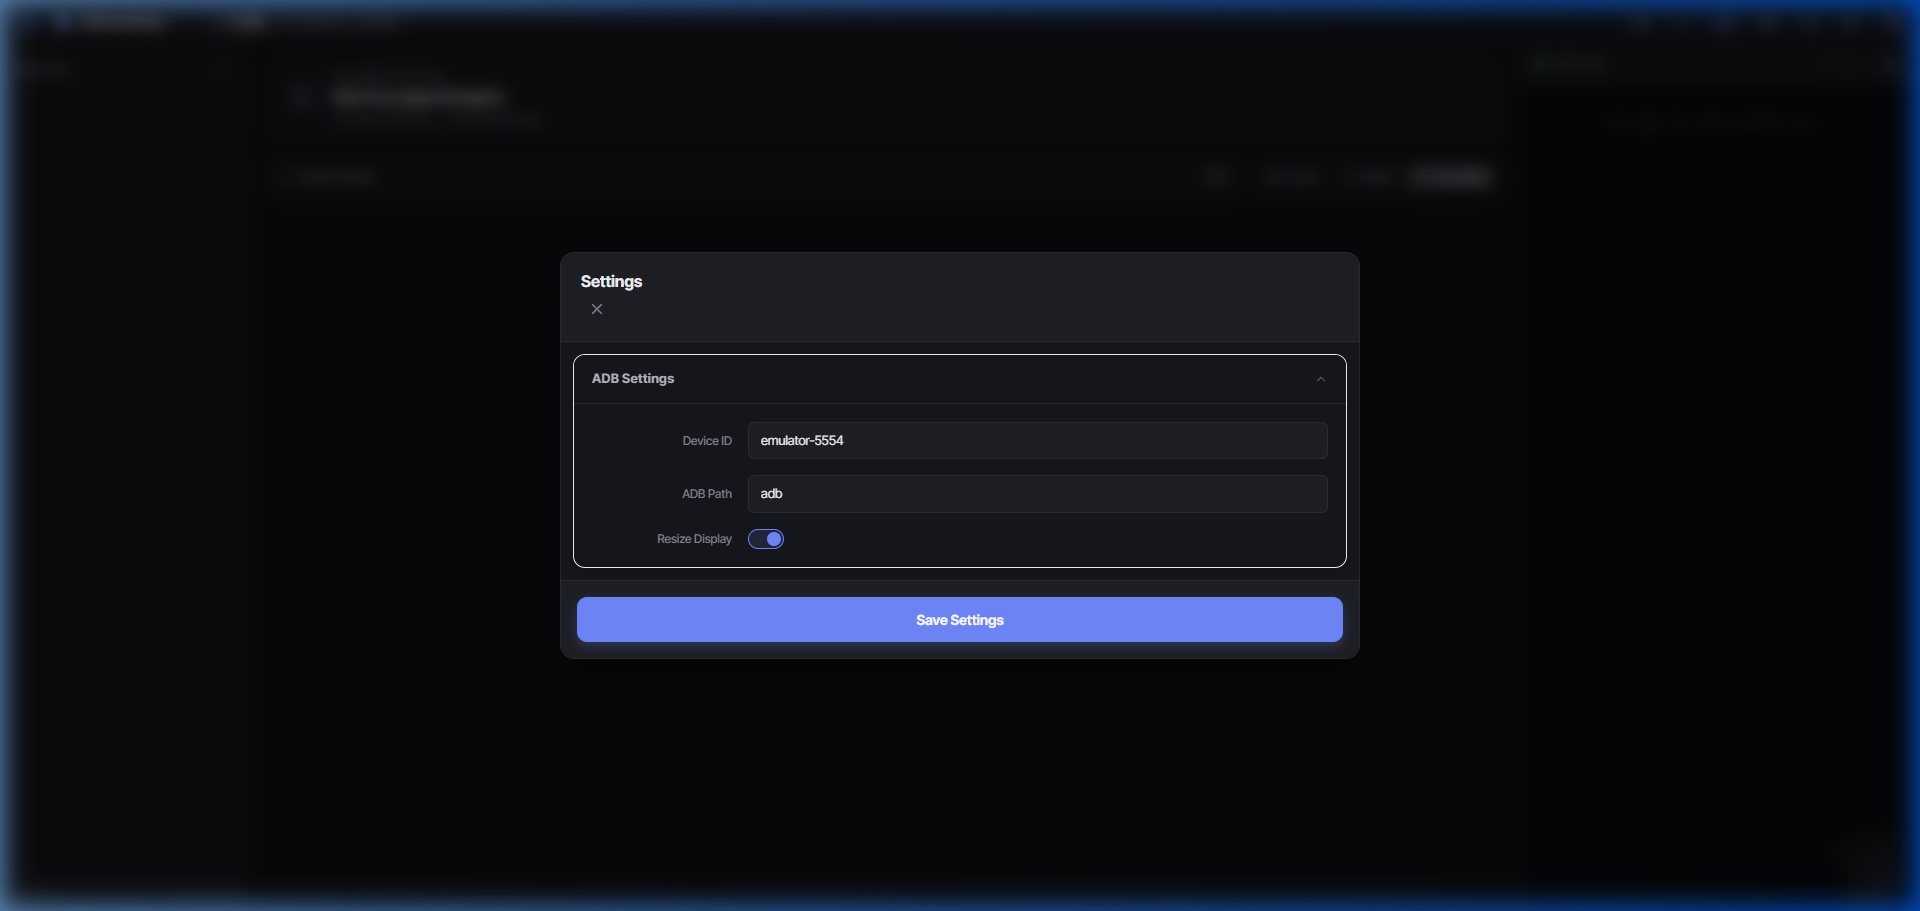 ADB Settings
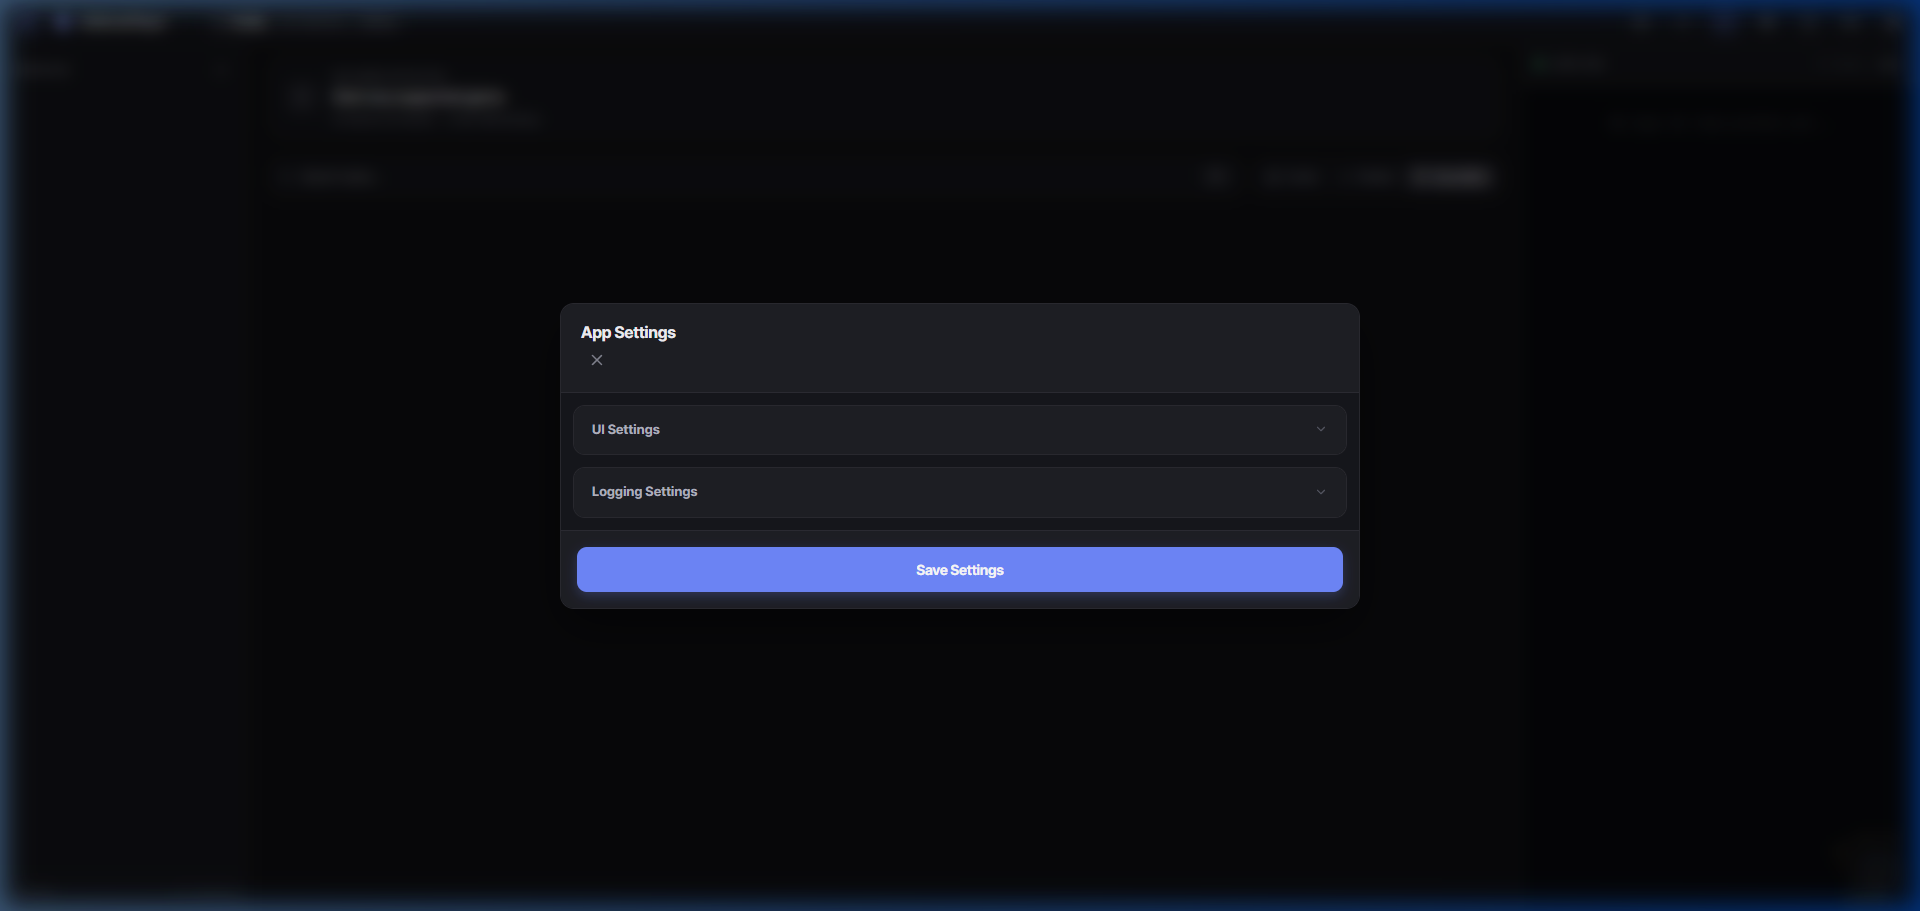 App Settings
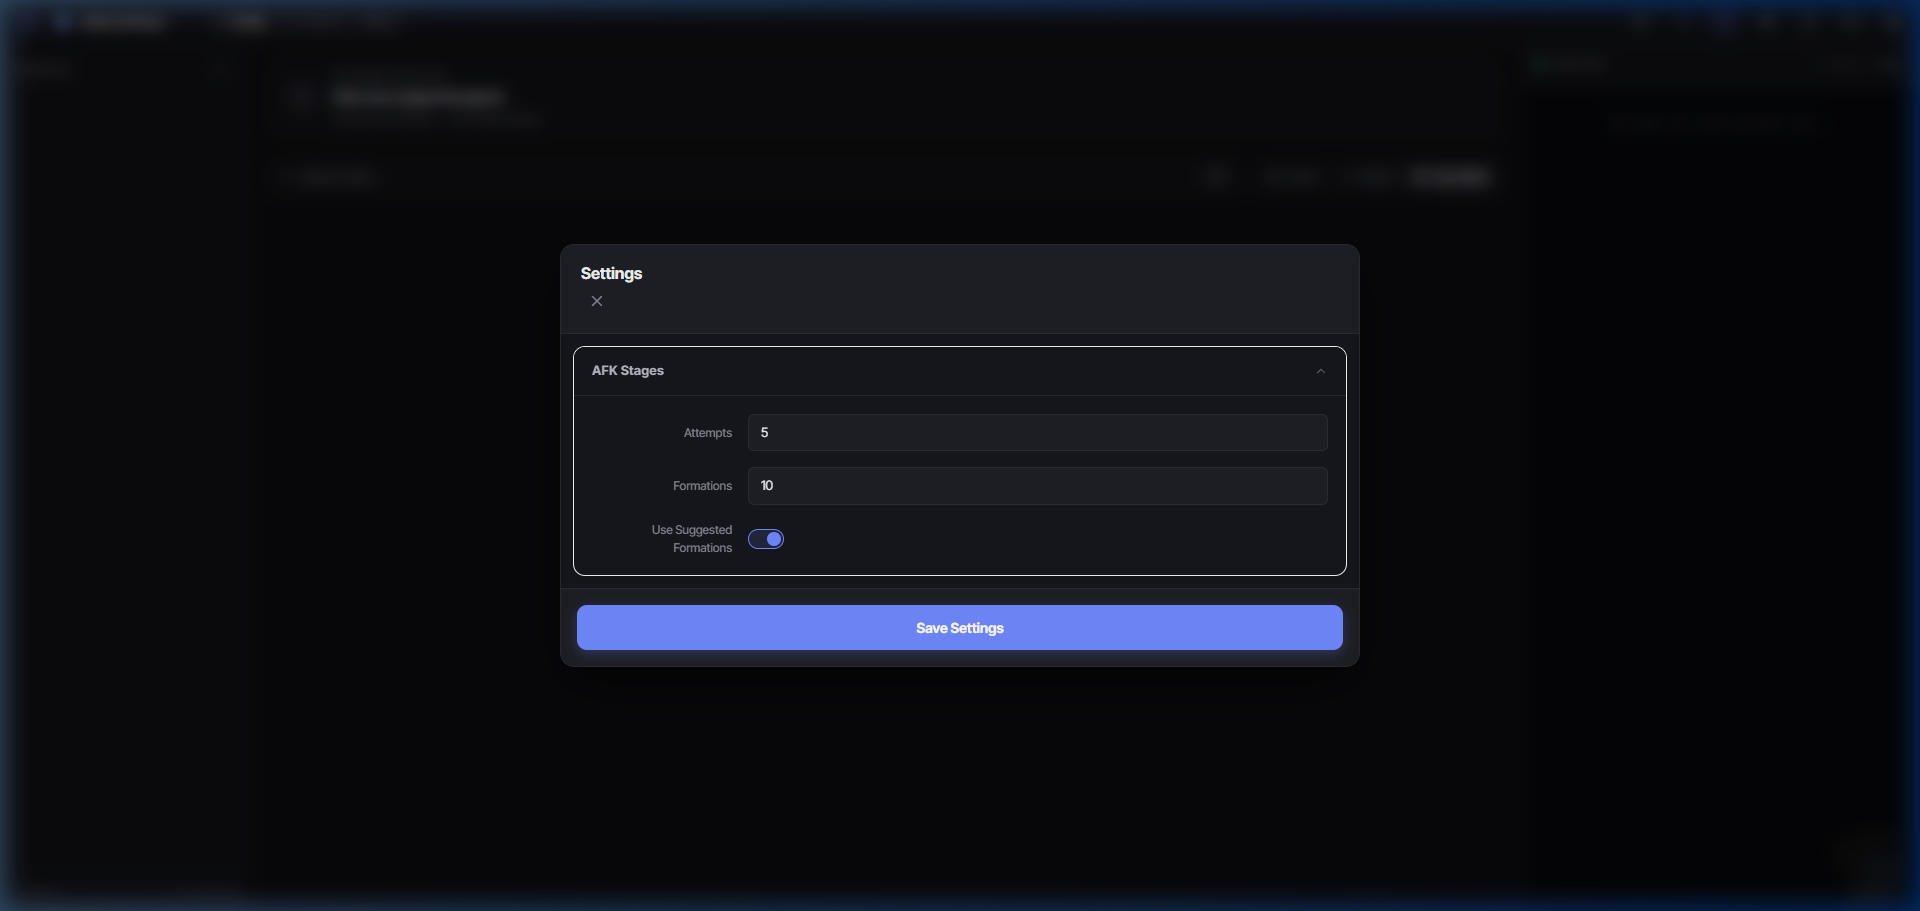 Game Settings
3. Log Panel
Monitor the bot’s activity in real-time.
- Toggle Log: Click the terminal icon in the status bar to show or hide the log panel.
- Log Level: Choose how much information you want to see (Info, Debug, Error).
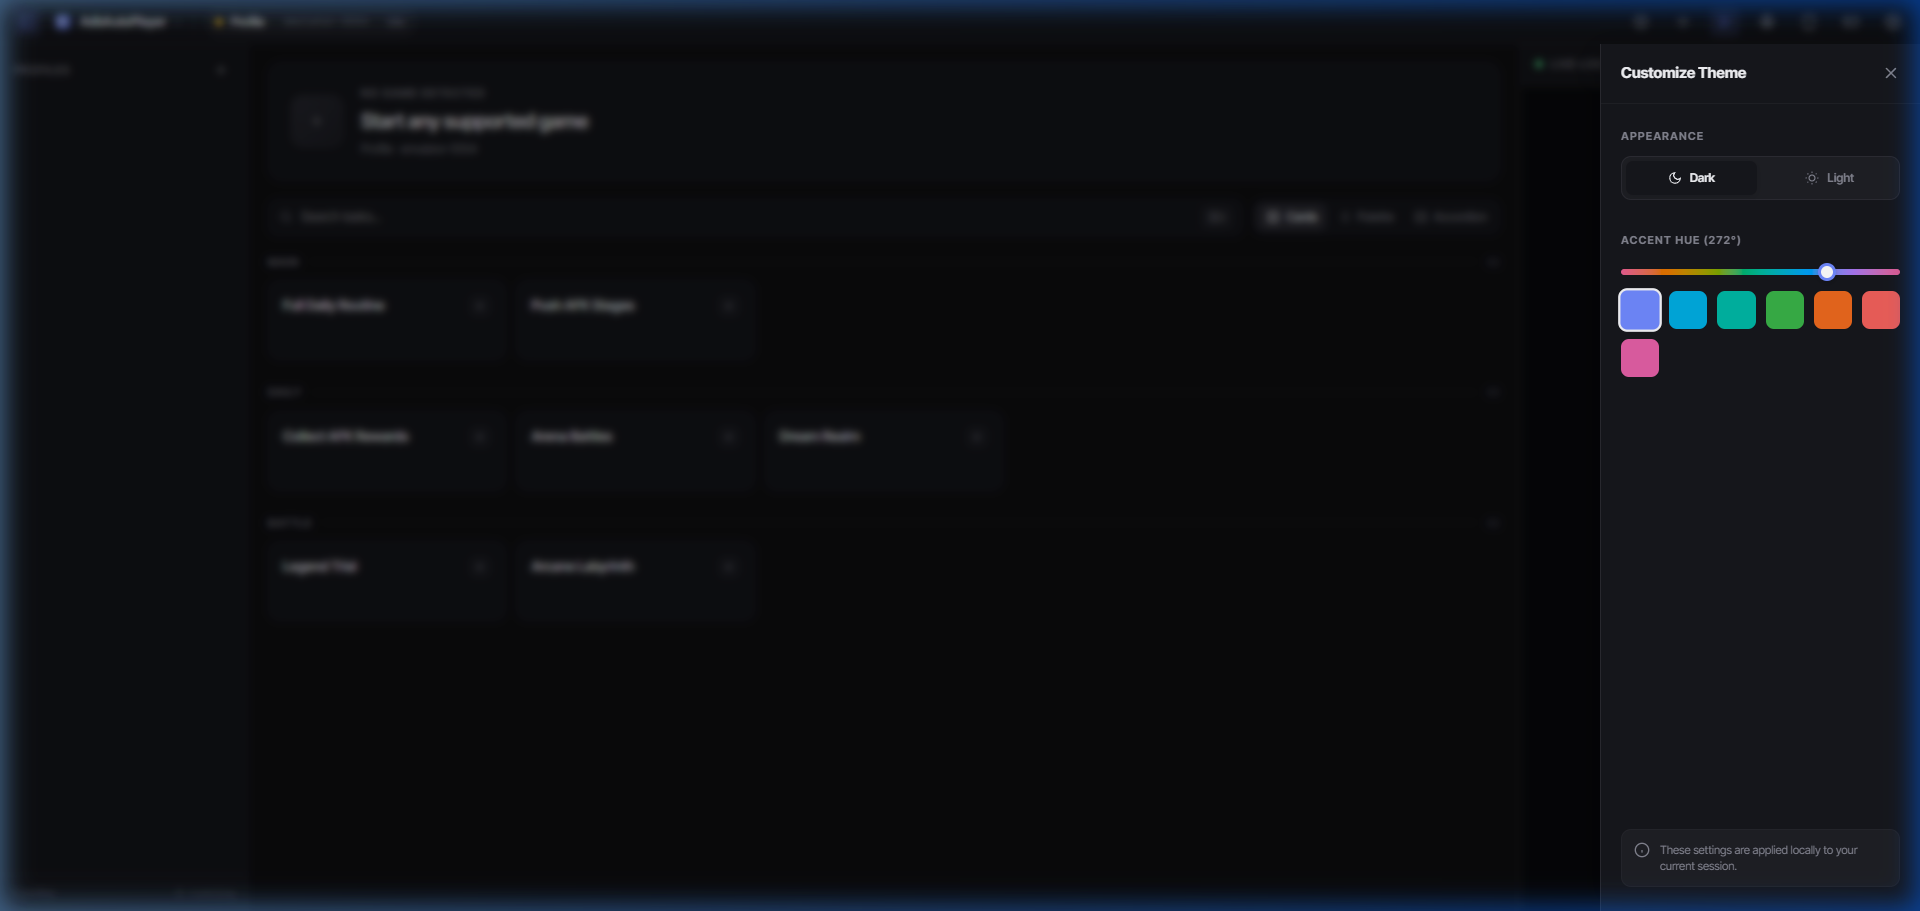
Customizing the Look
Theme Customizer
Click the palette icon in the status bar to open the Theme Customizer.
- Mode: Switch between Light and Dark themes.
- Accent Color: Use the slider to pick your favorite accent color for the UI.
View Modes
You can change how tasks are displayed in the dashboard by selecting a different view mode in the Theme Customizer:
- Cards View: (Default) Large, easy-to-tap cards for each task.
- Palette View: A more compact grid view.
- Accordion View: Group tasks by category in collapsible sections.
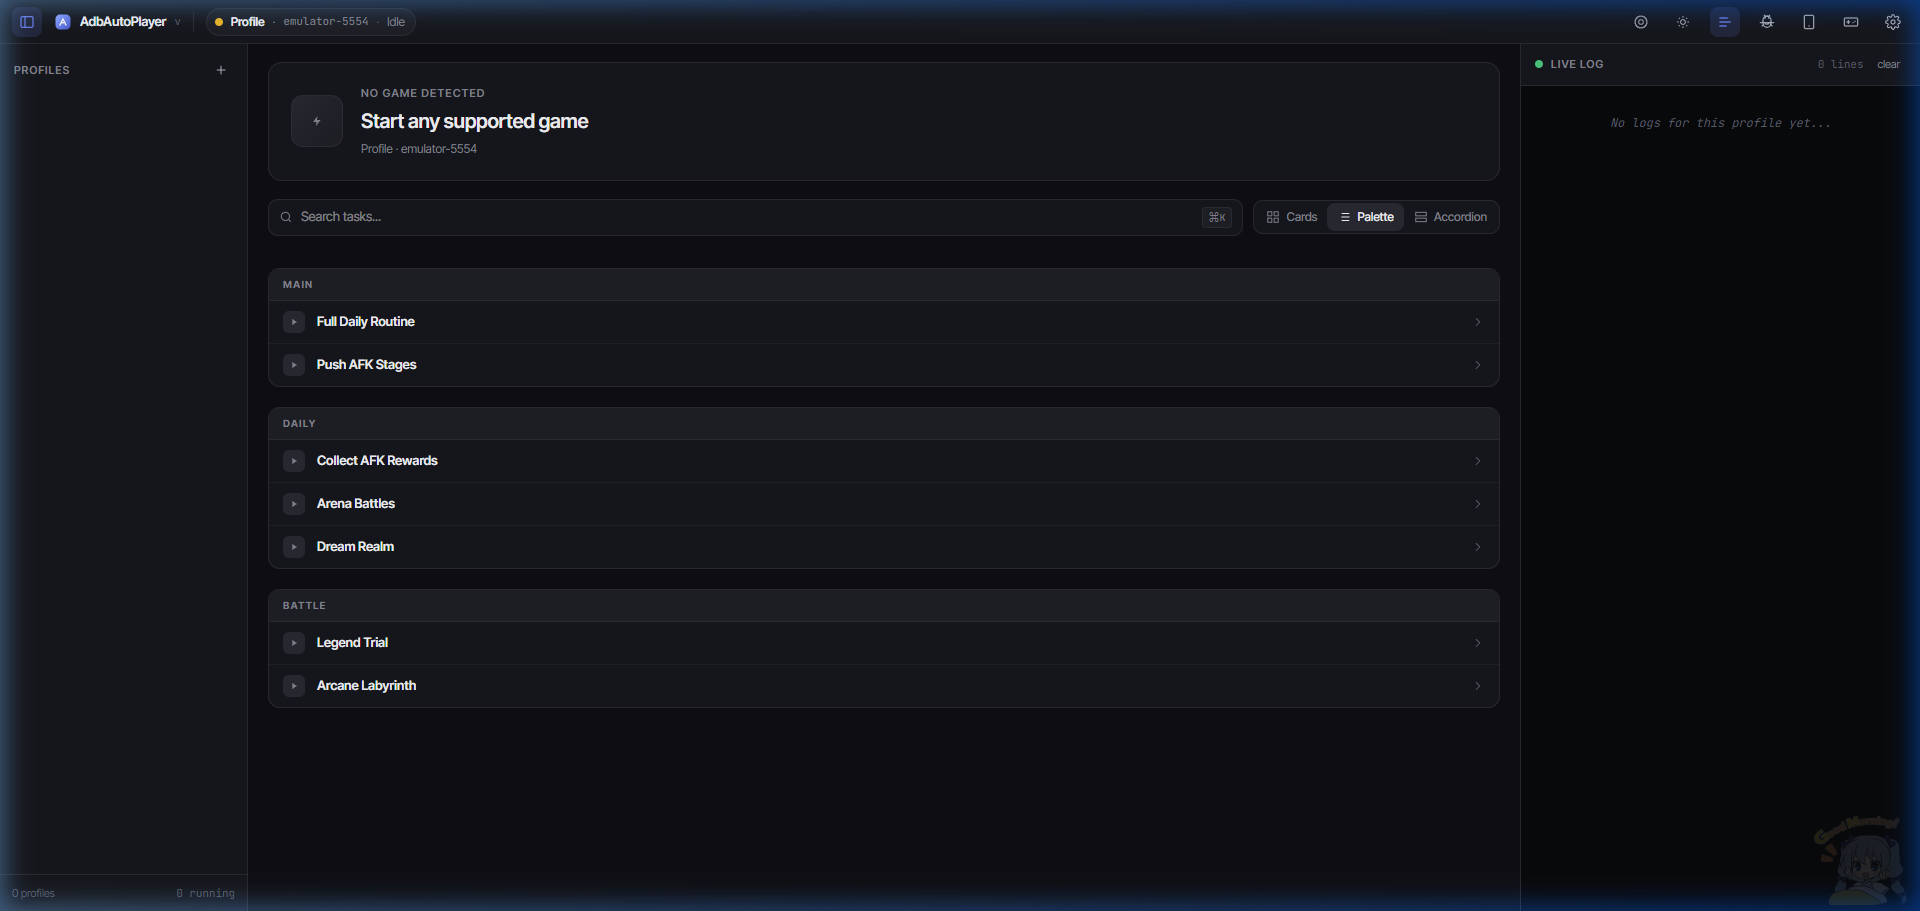 Palette View
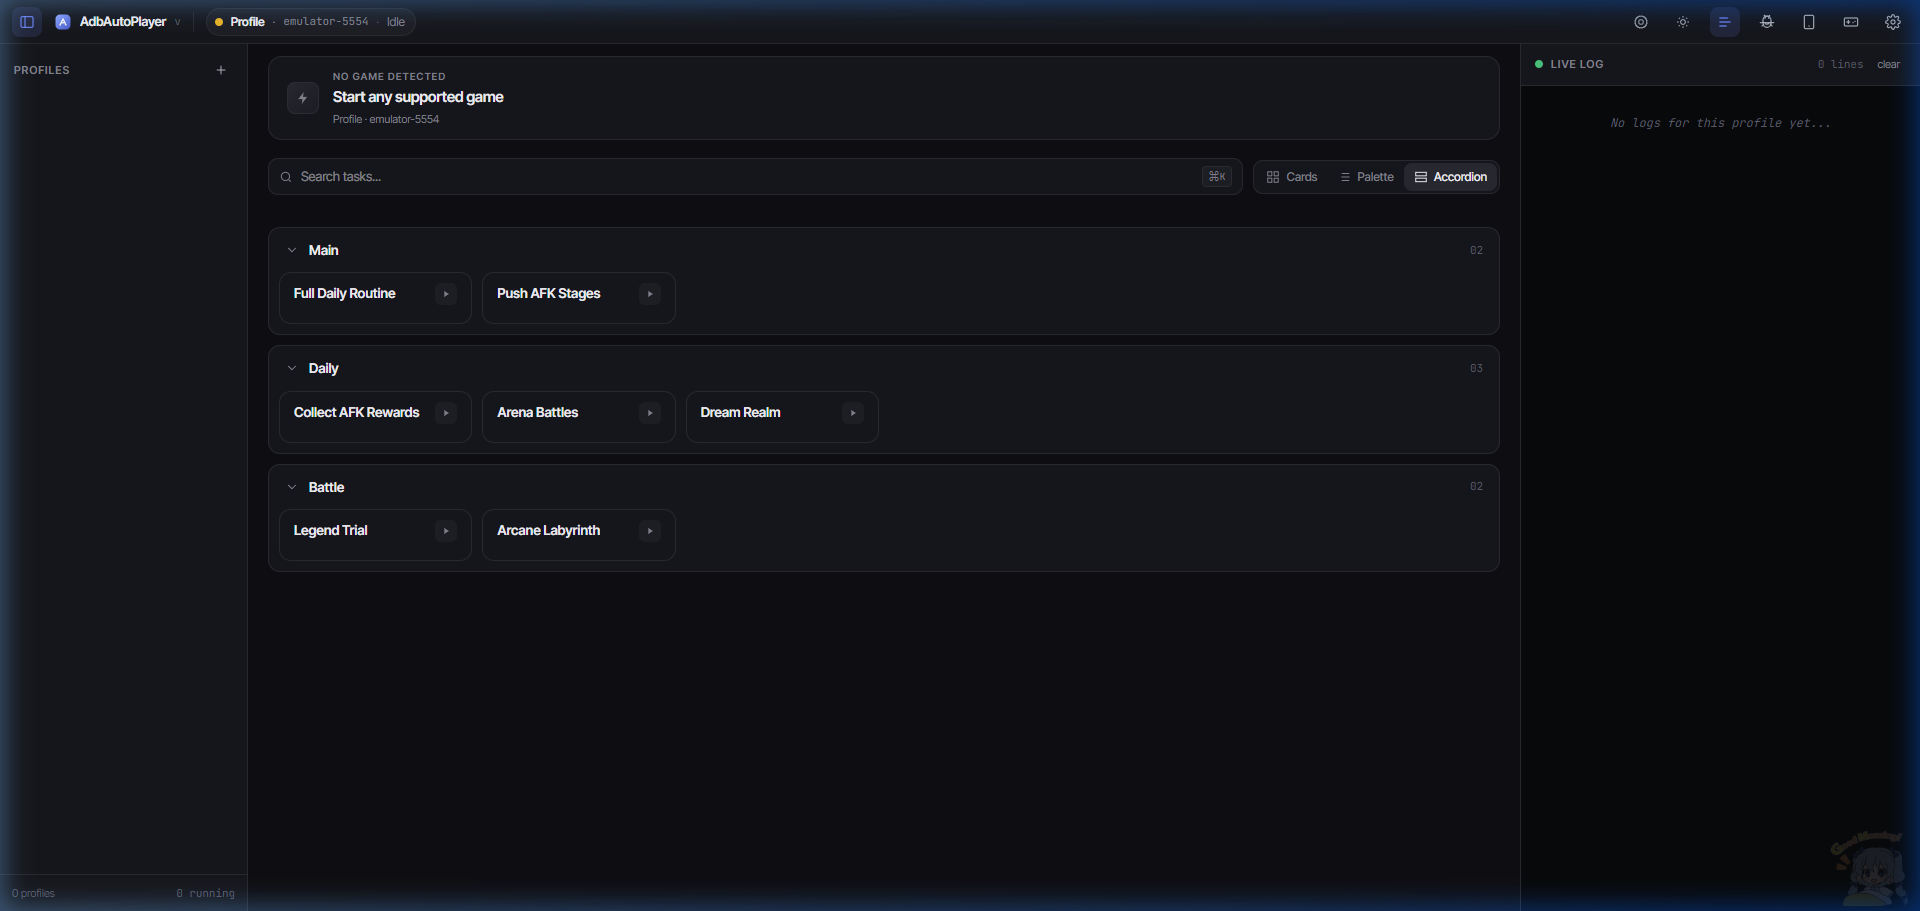 Accordion View
Emulator Settings
Important
Cloud Emulators like BlueStacks X cannot be used
MuMuPlayer (Windows) ← Best
Note
MuMuPlayer does not require enabling ADB in settings.
Emulator Settings
- Display:
- Resolution Setting: Select Mobile Mode (1080 × 1920).
BlueStacks 5 (Windows) & BlueStacks Air (MacOS)
Emulator Settings
- Display:
- Display Resolution: Select Portrait (1080 × 1920).
- Advanced:
- Android Debug Bridge (ADB): Enable this.
LDPlayer (Windows)
Emulator Settings
- Display:
- Resolution: Select Phone (1080 × 1920).
- Others:
- ADB Debugging: Enable Local Connection.
ADB Settings
Device ID: emulator-5554
MuMuPlayer Pro (MacOS)
Warning
I suggest using BlueStacks Air instead because it’s free.
Emulator Settings
- Display → Display Size Phone:
- Set Device Display to 1080 × 1920.
- Other:
- Enable ADB: Select Try to use the default port (5555).
Real Phone USB Debugging Setup Guide
A comprehensive guide to enable USB debugging on popular Android phone brands for AdbAutoPlayer.
Table of Contents
- ADB Settings
- Important Considerations
- Prerequisites
- Universal Steps
- Brand-Specific Instructions
- Troubleshooting
ADB Settings
Device Settings in AdbAutoPlayer
| Setting | Description |
|---|---|
| Resize Display (Phone/Tablet) | Enable this - Changes your display size to 1080x1920 when the bot starts |
Important Considerations
Warning
Security Notes:
- USB debugging grants full control over your device
- Always use trusted computers and quality USB cables
- Consider disabling USB debugging when not actively using automation
- Some banking and security apps may detect developer mode
- Always revoke USB debugging authorizations from untrusted computers
- Consider security implications before enabling OEM unlocking
Caution
Device Health Notes:
- Avoid using the bot when your device temperature is too high
- High temperatures can cause permanent damage to battery and components
Prerequisites
Before starting, ensure you have:
| Requirement | Details |
|---|---|
| USB Cable | Must support data transfer (most modern cables do, but some old ones are charge-only) |
| Admin Rights | Administrative privileges on your computer |
| Android Version | Android 4.2 (API level 17) or higher |
Universal Steps
These steps apply to ALL Android devices, regardless of brand:
Step 1: Enable Developer Options
- Open Settings on your Android device
- Scroll down and tap “About phone” or “About device”
- Find “Build number” (location varies by brand - see brand-specific sections below)
- Tap “Build number” 7 times rapidly
- You’ll see countdown: “You are now X steps away from being a developer”
- After 7 taps: “You are now a developer!” or “Developer mode has been enabled”
- Go back to the main Settings menu
- Look for “Developer options” (usually under System, Additional settings, or directly in Settings)
Step 2: Enable USB Debugging
- Open “Developer options”
- Toggle “Developer options” ON (if there’s a master switch at the top and it’s off)
- Scroll down and find “USB debugging”
- Toggle “USB debugging” ON
- Confirm when prompted with “Allow USB debugging?”
- Check if there are more options that start with USB debugging like “USB debugging (Security settings)” if yes Toggle ON
Step 3: Additional Developer Settings (Optional but Recommended)
While in Developer options, consider enabling these for better automation:
| Setting | Purpose |
|---|---|
| “Stay awake” | Keeps screen on while charging |
| “Disable adb authorization timeout” | Prevents repeated authorization prompts (Android 11+) |
Brand-Specific Instructions
Samsung
Build Number Location:
- Samsung One UI 4.x and Samsung One UI 5.0+:
Settings → About phone → Software information → Build number - Older Samsung:
Settings → About device → Build number
Additional Samsung Steps:
- After enabling Developer options, you may need to restart your phone
- In Developer options, look for “USB debugging” under the Debugging section
- Samsung devices may show additional security warnings - tap “OK” to proceed
- Some Samsung devices have “Developer options” under Settings → Developer options directly
Knox Security Note:
- Samsung Knox may interfere with automation
- If you encounter issues, try disabling Knox security features (this may void warranty)
Google Pixel
Build Number Location:
- Android 12+:
Settings → About phone → Build number - Android 8-11:
Settings → System → About phone → Build number - Android 7 and below:
Settings → About phone → Build number
Additional Pixel Steps:
- “Developer options” appears under Settings → System → Developer options
- Pixel devices typically have the cleanest Android experience with minimal restrictions
OnePlus
Build Number Location:
- OxygenOS 12+:
Settings → About device → Version → Build number - OxygenOS 11:
Settings → About phone → Version → Build number - Older OxygenOS:
Settings → About phone → Build number
Additional OnePlus Steps:
- OnePlus devices may require you to restart after enabling Developer options
- “Developer options” appears under Settings → System → Developer options
- Some OnePlus devices have additional security prompts
Xiaomi/MIUI
Build Number Location:
- MIUI 12+:
Settings → About phone → All specs → Build number - MIUI 11:
Settings → About phone → MIUI version (tap 7 times instead of build number) - Older MIUI:
Settings → About phone → MIUI version
Optional Xiaomi Steps:
- Disable MIUI Optimizations (for better ADB functionality):
- In Developer options, find “Turn off MIUI optimization”
- Toggle it OFF and restart your device
Huawei/Honor
Build Number Location:
- EMUI 10+:
Settings → About phone → Build number - EMUI 9:
Settings → System → About phone → Build number - Older EMUI:
Settings → About phone → Build number
Additional Huawei/Honor Steps:
- Huawei devices usually have strict security measures
- After enabling Developer options:
- “Developer options” appears under Settings → System → Developer options
Oppo
Build Number Location:
- ColorOS 12+:
Settings → About device → Version → Build number - ColorOS 11:
Settings → About phone → Version → Build number - Older ColorOS:
Settings → About phone → Build number
Additional Oppo Steps:
- Oppo devices require additional verification steps
- After enabling Developer options:
- “Developer options” appears under Settings → Additional settings → Developer options
- Enable “USB debugging”
Oppo-Specific Requirements:
- You may need to be logged into your Oppo account
- Some features require account verification similar to Xiaomi
Vivo
Build Number Location:
- Funtouch OS 12+:
Settings → About phone → Software version → Build number - Funtouch OS 11:
Settings → About phone → More parameters → Build number - Older Funtouch:
Settings → About phone → Build number
Additional Vivo Steps:
- Vivo devices have similar restrictions to Oppo
- After enabling Developer options:
- “Developer options” appears under Settings → System → Developer options
Vivo-Specific Requirements:
- Vivo Account Verification:
- Login to your Vivo account may be required
- Some security features require account verification
Sony
Build Number Location:
- Android 10+:
Settings → About phone → Build number - Android 8-9:
Settings → System → About phone → Build number - Older Android:
Settings → About phone → Build number
Additional Sony Steps:
- Sony devices typically follow stock Android closely
- “Developer options” appears under Settings → System → Developer options
- Sony devices generally have fewer manufacturer restrictions
LG
Build Number Location:
- LG UX 9+:
Settings → General → About phone → Software info → Build number - LG UX 8:
Settings → About phone → Software info → Build number - Older LG UX:
Settings → About phone → Build number
Additional LG Steps:
- LG devices may require restart after enabling Developer options
- “Developer options” appears under Settings → General → Developer options
- Some LG devices have additional security prompts
Motorola
Build Number Location:
- Android 10+:
Settings → About phone → Build number - Android 8-9:
Settings → System → About phone → Build number - Older Android:
Settings → About phone → Build number
Additional Motorola Steps:
- Motorola devices typically follow stock Android
- “Developer options” appears under Settings → System → Developer options
- Minimal manufacturer restrictions typically apply
Troubleshooting
Common Issues and Solutions
| Issue | Solution |
|---|---|
| “Developer options” doesn’t appear | Try restarting your phone, then check Settings again Look under “System”, “Additional settings”, or “Advanced” |
| Computer doesn’t recognize device | Install manufacturer-specific USB drivers Try different USB cables and ports Google: “[device name] USB drivers” |
Advanced Troubleshooting
For Huawei/Honor devices:
- Disable protected apps feature
- Check if HMS Core is interfering
For Oppo/Vivo devices:
- Verify account login status
- Disable aggressive battery optimization
- Check auto-start management settings
Windows Setup Guide
Important
Check Emulator Settings if you haven’t already!
Installation
- Downloadthe latest release of AdbAutoPlayer: AdbAutoPlayer_x.y.z_x64_en-US.msi (it will show the actual version instead of x.y.z)
- Run the Installer.
Starting AdbAutoPlayer
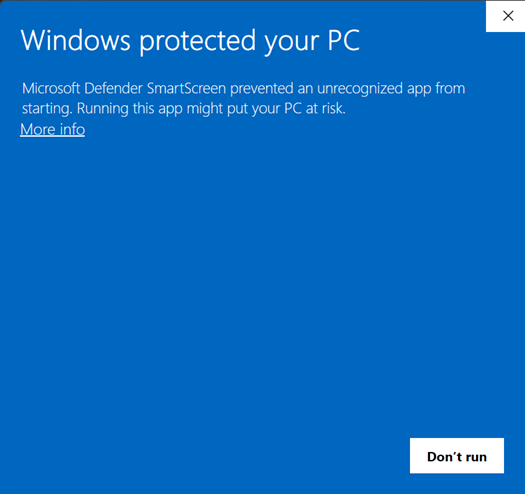
When launching AdbAutoPlayer, Windows Defender SmartScreen may block the application. To proceed:
- Click the More info link.
- Click the Run anyway button that appears.
- Wait for the application to start.
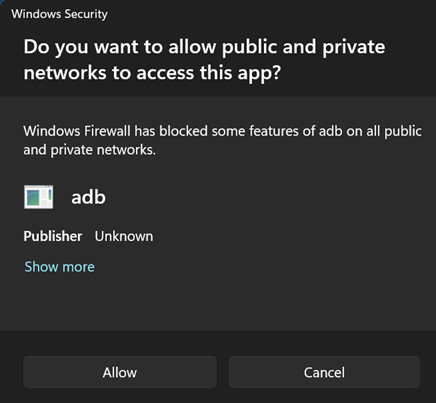
Windows Security pop up
If this pop up appears simply click Allow. If you want more info read here: ADB (Android Debug Bridge)
Continue to the Troubleshooting Guide
macOS Setup Guide
Important
Ensure you have reviewed the Emulator Settings before proceeding.
Installation Steps
-
Install Homebrew
Download and install Homebrew by following the instructions on their official website. -
Install ADB
Use Homebrew to install Android Debug Bridge (ADB):brew install --cask android-platform-tools -
Install Tesseract
Used for optical character recognition (OCR):brew install tesseract -
Download AdbAutoPlayer
- Visit the AdbAutoPlayer GitHub releases page to download the latest
AdbAutoPlayer_aarch64.app.tar.gz. - Extract the
.tar.gzfile to a folder on your computer. - Follow the Instructions in the
MACOS_READ_THIS_IMPORTANT.txtyou can also find in the releases page AdbAutoPlayer GitHub releases page
- Visit the AdbAutoPlayer GitHub releases page to download the latest
Additional Information
- Build Locally (Optional)
To build the app from source, follow the instructions in the Dev & Build Guide.
Linux Setup Guide
Important
Linux is not officially supported.
None of the maintainers use Linux, and we do not provide Linux builds, troubleshooting, or assistance.
If You Still Want to Try:
-
Build It Yourself
- You can try following the Dev & Build guide.
- No support will be provided—you’re on your own.
- Functionality is not guaranteed, and you may encounter Linux-specific issues.
-
Contribute Proper Support
- If you’re willing to maintain Linux builds, fix issues, and document setup, contact us.
- Without an active Linux maintainer, official support will never happen.
We will not answer questions about Linux builds. Check back if community contributions change this in the future.
Troubleshooting
General try disabling Device Stream
If Device Streaming is active try disabling it in ADB Settings if you encounter performance issues.
Emulator
Note
Test both MumuPlayer and BlueStacks 5
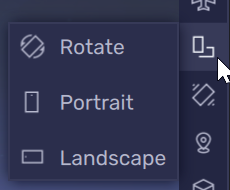
This bot only works in Portrait mode
- Please double-check your Emulator Settings.
- If the game automatically switches to Landscape on start, use the Rotate Menu and select Portrait.
Missing files
This issue usually occurs due to one of the following reasons:
- Windows Security or another Antivirus software flagged a false positive and deleted/quarantined one or more files. Learn more about false positives.
- An error occurred during the update process, preventing all files from being properly installed.
Make sure to extract all files and check your antivirus settings to prevent accidental deletions.
File contains a virus or potentially unwanted software
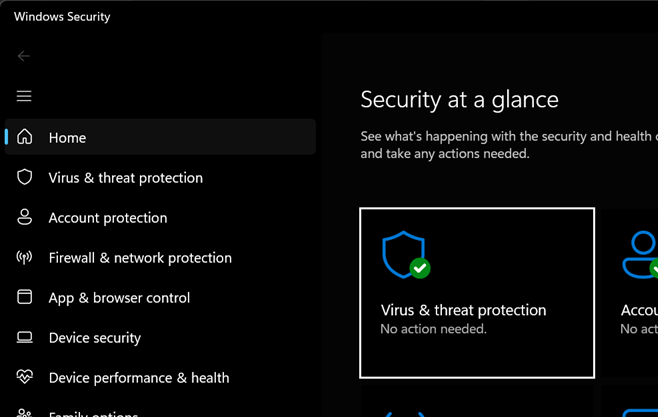
- Search Windows Security
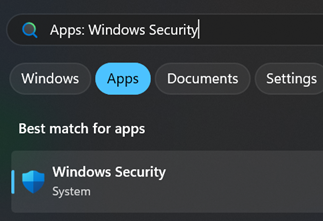
- Select Virus & threat protection
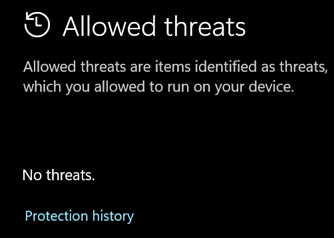
- Click allowed threats
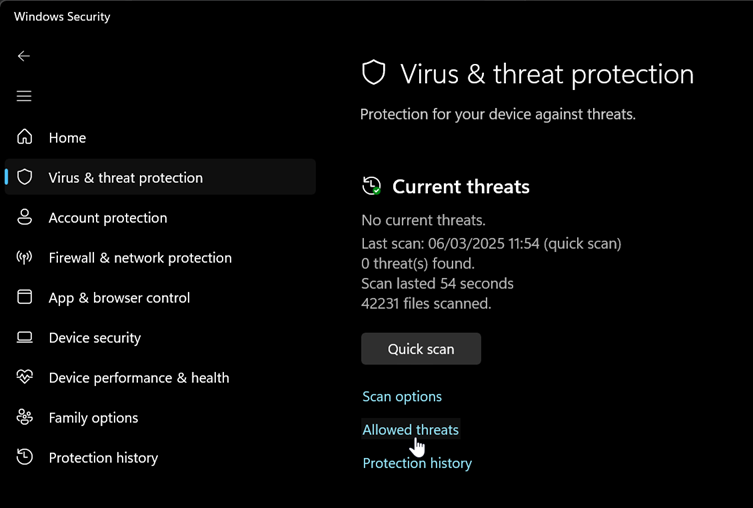
- Search for a Threat that has AdbAutoPlayer or adb_auto_player in the file name or path then click Actions and Restore
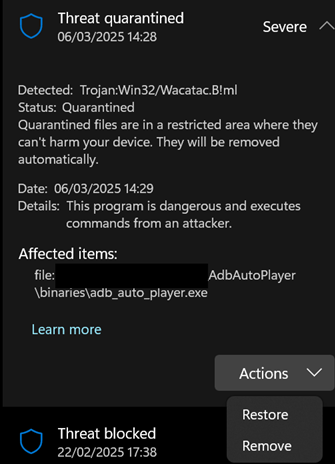
- If you have no Threats click Protection history and check there then do the same as step 4.
Tap to restart this app for a better view
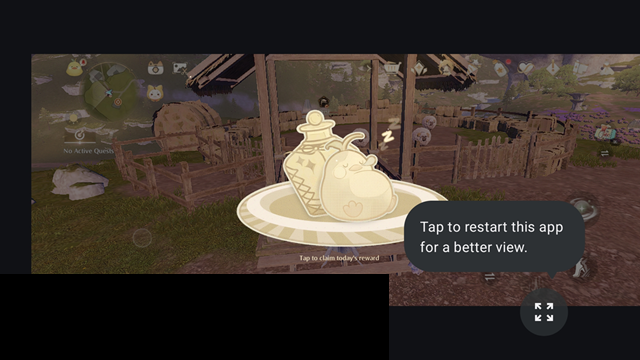
Some games will not automatically scale when the resolution changes. You simply have to press the button and the bot will work.
AFK Journey
Support Game Languages:
- English
Supported Resolutions:
- 1080x1920
Bot Features
AdbAutoPlayer provides a comprehensive suite of automation for AFK Journey:
- Daily Routine: Automatically perform all daily tasks in one click.
- Stage Pushing: Push AFK stages with automatic team formation and retries.
- Arena Battles: Automate your daily arena matches.
- Dream Realm: Collect rewards and participate in Dream Realm battles.
- Legend Trial: Progress through the various towers.
- Arcane Labyrinth: Clear the labyrinth levels automatically.
In-Game Recommended Settings
To improve performance and reduce lag, adjust the following in-game settings:
- Set Graphics to Minimum while keeping high-performance Power Mode.
- Disable Battle Texts: Go to
Battle > Combat Text > Off. This prevents excessive on-screen text, reducing emulator lag. - Disable Battle Logs: Under Combat Text, turning off battle logs minimizes post-battle processing and improves overall game performance.
Guitar Girl
Bot Features
AdbAutoPlayer helps you with the tapping in Guitar Girl:
- Auto Tapper: Automatically taps to generate likes.
- Skill Activation: Uses skills as they become available.
- Daily Collection: Collects daily rewards and bonuses.
Supported Resolutions:
- 1080x1920
Blue Protocol Star Resonance
Bot Features
AdbAutoPlayer provides automation for various activities in Blue Protocol Star Resonance:
- Fishing: Automate the fishing minigame to collect resources.
- Simple Gathering: Automatically gather resources from the world.
- Wondrous Tag: Automate the Wondrous Tag activities.
- Devourer: Help with Devourer related tasks.
Supported Resolutions:
- 1080x1920
Dev
- Install Python https://www.python.org/downloads/
- Install Rust & Cargo https://doc.rust-lang.org/cargo/getting-started/installation.html
- Install Node https://nodejs.org/en/download
- Install pnpm https://pnpm.io/installation
pnpm install- Follow https://pytauri.github.io/pytauri/latest/usage/tutorial/using-pytauri/
After setup, you should be able to run the GUI via:
pnpm pytauri dev
Setup pre-commit
uv pip install --group dev -e src-tauri
uvx pre-commit install
Check if it’s working:
uvx pre-commit run --all-files
Troubleshooting
If running the development server fails with the error:
No module named adb_auto_player
You can fix it by reinstalling the Tauri package:
uv sync --reinstall-package=tauri-app
Common pre-commit Fixes
TID251 time.time is banned
Use this prompt with an AI to fix it instantly:
Replace any wall-clock-based elapsed-time logic (`time.time()`, `datetime.now()`) with monotonic timing. Keep the same durations but use `time.monotonic()` or `time.perf_counter()` for comparisons. Do not change logging or timestamp code.
```python
#TODO your code snippet
```
TID251 cv2.split is banned
Use this prompt with an AI to fix it instantly:
Replace `cv2.split()` with direct numpy array indexing for better performance. OpenCV uses BGR format, so use `image[:, :, 0]` for blue, `image[:, :, 1]` for green, and `image[:, :, 2]` for red.
```python
#TODO your code snippet
```
Translations Guide
This guide explains how to add new languages, update translations, and maintain the internationalization system for AdbAutoPlayer.
📁 File Structure
frontend/src/lib/i18n/
├── README.md          # This guide
├── i18n.ts           # Translation system core
├── locales.ts        # Language configuration
├── jp.json           # Japanese translations
└── vn.json           # Vietnamese translations
🌐 Currently Supported Languages
- English (en) - Default language
- Japanese (jp) - Partially translated
- Vietnamese (vn) - Partially translated
🚀 Quick Start
Adding a New Language
- Create translation file:
frontend/src/lib/i18n/[language-code].json - Update locales.ts: Add language to enum and import
- Update backend constraint: Add language option to Go backend
- Test the implementation
Updating Existing Translations
- Edit the JSON file: Modify translations in existing language files
- Test in application: Build and verify changes
- Commit changes: Submit via pull request
📋 Detailed Instructions
1. Adding a New Language
Step 1: Create Translation File
Create a new JSON file: frontend/src/lib/i18n/[language-code].json
{
  "Stop Action": "Your Translation",
  "Language": "Your Translation",
  "Device": "Your Translation",
  "Update": "Your Translation",
  "User Interface": "Your Translation"
}
Step 2: Update Frontend Settings
Edit frontend/src/lib/i18n/locales.ts:
// Add import
import newLang from "./[language-code].json";

// Add to enum
export enum SupportedLocale {
  EN = "en",
  JP = "jp",
  VN = "vn",
  NEW_LANG = "[language-code]", // Add this line
}

// Add to locales object
const locales: LocaleDictionary = {
  [SupportedLocale.EN]: {},
  [SupportedLocale.JP]: jp,
  [SupportedLocale.VN]: vn,
  [SupportedLocale.NEW_LANG]: newLang, // Add this line
};
Step 3: Update Backend Settings
Edit internal/ipc/constraint.go:
"Language": NewSelectConstraint([]string{
    "en",
    "jp",
    "vn",
    "[language-code]", // Add your language code
}, "en"),
2. Updating Existing Translations
Edit Translation Files
Open the appropriate JSON file and modify translations:
{
  "Old Key": "Updated Translation",
  "New Key": "New Translation"
}
3. Adding More Translations
Find Untranslated Text
- Run the application in your target language
- Look for English text that should be translated
- Check the source code for text strings used with
$t()function
Add Missing Translations
Add new key-value pairs to the JSON file:
{
  "Existing Translation": "Existing Value",
  "New English Text": "New Translated Text"
}
🔍 Finding Text to Translate
Common Locations
Note
Check any of the existing translation files!
- Button labels: Look for buttons still showing English text
- Error messages: Check error dialogs and notifications
- Settings labels: Settings form field names
- Menu categories: Section headers and groupings
- Tooltips: Hover text on buttons and controls
Search in Code
Look for these patterns in the codebase:
// Direct translation calls
$t("Text to translate")

// Template usage
{$t("Text to translate")}

// With interpolation
$t("{{game}} Settings", { game: gameName })
🧪 Testing Your Changes
Verification Checklist
- Language appears in dropdown
- All buttons are translated
- Application builds successfully
- Language switching works smoothly
📝 Example: Complete Translation File (Vietnamese)
{
  "Stop Action": "Dừng Hành Động",
  "Language": "Ngôn Ngữ",
  "Device": "Thiết Bị",
  "Update": "Cập Nhật",
  "User Interface": "Giao Diện Người Dùng",
  "Something went wrong": "Đã xảy ra lỗi"
}
Happy translating! 🌍
Frontend README
Node
Install the latest version here: https://nodejs.org/en/download/
Svelte with SvelteKit and Skeleton
This project is built using Svelte with SvelteKit.
We also use Skeleton, a UI toolkit for Svelte, to help with styling and components.
Setup
Follow Dev & Build
Contributing
Nothing here yet—PRs are welcome.
Writing Bots
Important
Work in Progress.
Check out Dev & Build if you need help with setting up the project in general.
📝 Contribution Opportunities
🔧 Backend Development
Android Multi-Touch Gesture Implementation (PoC)
Library: uiautomator2
Challenge:
ADB lacks native multi-touch gesture support. uiautomator2 offers:
- Coordinate-based tapping (
d.click(x, y)) - Screenshot capture (
d.screenshot()) - Advanced gestures (swipe, pinch, etc.)
Goals:
- Develop PoC for multi-touch gestures
- Prioritize pinch-to-zoom for game automation
Extended Opportunities:
- Explore additional uiautomator2 game automation features
- Performance comparison: uiautomator2 vs standard ADB
- Benchmark tests for shared functionality (tap, screenshot, swipe)
Desktop Client Support Investigation
Current Understanding:
- Mouse click simulation limitations (requires actual cursor movement)
- Screenshot challenges with display scaling/multi-monitor setups
- Higher detection risk compared to ADB (if Lilith starts to care about botting)
Implementation Needs:
- Device abstraction layer (Android vs Desktop)
- Unified input mapping system
# The actual bot code should not end up looking like this. if device.platform == "Android": device.press_back_button() elif device.platform == "DesktopApp": device.keyboard.press("ESC") - Complete desktop interaction logic
🖥️ Frontend Development
Global Hotkey Settings Component
Create a Svelte Component to edit a single Global Hotkey in the Settings.
You can decide what format it should be stored in, in the Settings too.
📖 Documentation
Emulator Setup Guides
Format: Individual .md files per emulator
Needed Guides:
- MuMu Player
- BlueStacks
- LDPlayer
- MuMu Pro (Mac)
- BlueStacks Air (Mac)
Guide Requirements:
- Default device ID setup
- ADB enabling steps
- Recommended Settings
- Multi-instance device identification
Physical Device Setup
Topics Needed:
- Wireless debugging setup
Custom Routine Documentation
Content Needed:
- Feature explanation and workflow
- Practical examples (AFK Journey reference)
🎮 AFK Journey Specific
Arcane Labyrinth Optimization (Difficulty 15+)
Goal: Consistent Floor 16 clears
Suggestions:
- Coordinate with Arcane Lab channel for team comps
- Develop rune/crest priority system
Fishing
This is 80% done only needs logic to navigate to fishing spots.
Feature Documentation
Scope:
- Complete feature catalog
- Usage instructions
- Settings options
- Visual examples
🚧 In Progress
- AFKJ Manual Stage Agent - @valextr
💬 Getting Help
- Discord: Use the badge above
- GitHub: Create issues for bugs/feature requests